• Finished Quilts in 2010

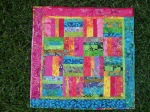
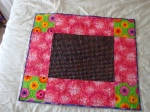
    Click pictures for full details! Julia's Field of Blessings See Mom, I *Can* Make Snowmen in Texas! All Shook Up Pansies & Primroses Vintage Spring Vintage Baby A Bad Copy
  • Finished Quilts in 2009

    Click pictures for full details! Sunshine & Swimming Pools Loving Hands Boy Woogies Carina's Quilt Front Charity Quilt 1 Charity Quilt 2
  • Finished Quilts: Previous Years

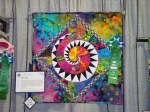
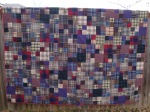
    My sister's quilt Elena's Signature Quilt Cosmic Spiral Simona's Flower Garden ...And Everything Nice The Wool Quilt The Original Woogie
  • Finished Craft Projects

    Traveling Car Playmat Brown Bear Matching Cards
  • Finished Girls’ Dresses & Costumes

  • Quilt To Do List

    *Julia's "Baby" Quilt
    *Bethlehem Quilt
    *Kaffe Fassett String Quilt
    *Star Happy Batik Quilt
    *Red & Tan Single Wedding Ring Quilt (blocks made)
    *Batik Charm Square Quilt
    *Lingerie Quilt
    *Purple & Gold Mystery Quilt (just needs quilting!)
    *Eagle paper-pieced Quilt (@ half pieced)
  • Other Craft Project To Do List

    *Alphabet Matching Card Game
    *Apple/Pear Dress for Elena
    *Pillow Case Dress for Julia
    *Knit Dress for Elena (need to do post!)
    *Knit Shorts for Me

For the Soldiers

It is *always* better for someone to be enjoying a quilt rather than a UFO (unfinished object) sitting in your sewing room gathering dust. I finally took this to heart and finished up 2 UFOs and donated them!

2012 06 24_0061.JPG

These quilts first appeared on my blog here, where I was sewing them in the kitchen to escape the mess of my sewing room, and here, where I finished the tops and was about to send them to my Mom to be quilted.  The blocks are originally from a swap bee I participated in *years* ago.  In this swap,  you’d turn in just as many blocks as you wanted in return, and the bee keepers were excellent at measuring and turning down blocks that didn’t meet size specifications.  This rule might seem mean, but after participating in a random Internet swap where the blocks came back up to 1/2″ bigger or smaller than the required measurement, I am *so* happy the bee keepers were strict.  These quilts were easy to put together.  (Another quilt a result of this bee is here — one I kept for myself!)
2012 06 24_0048.JPG

Each quilt measures about 66″x85″ — I think a great size for a man.
2012 06 24_0055.JPG

Somebody in the group called these blocks a single-wedding-ring, but I can’t name it that with confidence.  When I just googled that name, the block that popped up looked incredibly different.  So I can’t help with those details.  The blocks of this quilt were made so very many years ago!
2012 06 24_0050.JPG

My fave red fabric, also highlighting my Mom’s square-spiral quilting.

My mom finished the quilting for me LONG ago — a different design on each quilt if you notice – and then I put them in my closet.  Perhaps my closet binding-fairies would finish them up completely, right?  Um, no.  When that didn’t work and I finally got tired of all the space they were taking up in my closet, I did the binding.  At the last guild meeting I donated them to my guild’s Red, White & Blue project. They assured me they were perfectly acceptable even if they weren’t technically red, white and blue. Our guild regularly delivers these quilts to wounded soldiers at Brooke Army Medical Center.
2012 06 24_0064.JPG

This quilt has more of a swirl design quilted on it.

I did nearly have a heart attack after I finished these quilts.  I don’t normally wash my quilts right away, preferring the pristine condition, but I threw these in the washer because they had cat hair on them.  The last thing I would want to do is give someone an allergy attack when they snuggle with my quilt!  Despite all the color catchers I threw in the wash too, one of the white/tan fabrics was a magnet for the red dye floating in the water.  One block on each quilt, both made out of the same fabric, turned pink on me!  Yikes!

I sprayed the block and washed again with even more color catchers.  The blocks are still tinted pink, but not glaringly so anymore.  I was afraid I wouldn’t be able to donate the quilts, but I think they are good enough now.  Had you noticed a pink block in the quilts before I mentioned it?  No?  Then I’m good!  🙂

2012 06 24_0071.JPG

Oh, and almost forgot!  I also made a pillowcase for each quilt!  The pillowcases were made with the “hot-dog” method.  Here are the pillowcases with their quilts inside:
2012 06 24_0074_edited-1.JPG

*Oink! Oink!*

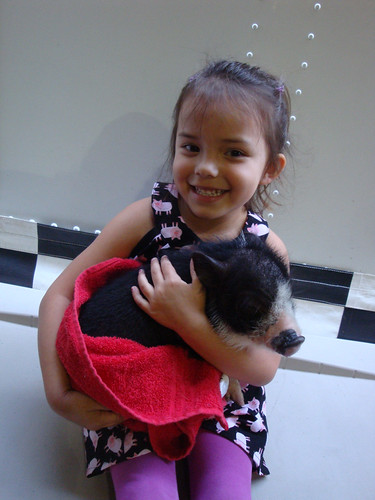
Piggies may seem to be an odd choice for a little girl’s dress.
2012 03 23_0040.JPG

Julia at the rodeo, ecstatic to be holding a pig.

But if you ask Julia, it’s a perfect subject for a little girl’s dress!

2012 03 23_0038.JPG

Awww, sweet piggie!

Julia is very proud of her ability to oink/snort.  Very proud.  And so it seemed quite natural to make her a dress full of little piggies.  And although I’ve had this fabric for months, it wasn’t until I knew I was going to have an opportunity to take pictures of Julia with a real live pig that I got off my bottom and whipped up a pig dress for her!

2012 03 23_0041.JPG

Yup, I had to shell out $5 for Julia to hold the pig.  I also received a Polaroid.  Just look at my tiny girl!

The only reason that it seems an odd choice for Julia is that the silly girl barely eats.  Unless it is a peanut-butter sandwich, pizza or cheese.

2012 03 23_0064.JPG

Better shot of the front of the dress.

This dress pattern is Simplicity 2270 – one I haven’t done before!  I altered it, but it is barely noticeable.  The dress has pockets, and in the pattern they are interior pockets but the front of the dress forms one side of the pockets.  I’m having trouble explaining this, but, in other words, the pockets were sewn to the inside front of the dress, and therefore would have had visible sewing lines.  I made them invisible pockets instead with 2 independent layers.  Blah.  Not only is it hard for me to figure out how to tell you about this, it took me a while to figure out how to do them, too.  Not sure if I did them in the most efficient manner, but it worked and Julia of course likes her pockets.  But from looking at it here you could never tell there were pockets!

2012 03 23_0065.JPG

Back of dress, with well-hidden zipper.  I’m starting to get confident with them!

I did like this pattern and can see myself doing more dresses in this style.

2012 03 23_0089.JPG

Julia posing with another pig.

And one last picture.  Finally!  Unfortunately Elena had to wear her school shirt to her field trip to the rodeo.  Otherwise, I would have snapped her picture in the sheep dress in front of this or other sheep at the petting zoo:

2012 03 23_0058.JPG

Ahhh, lost picture opportunity…. 

She May Be Big, But She’s Still My Little Girl

A few months ago my Mom and I were shopping at a quilt store together.  We didn’t *need* anything, but you know, sometimes it is just necessary to see what the quilt stores have.  Well, we didn’t need anything until we saw this great sheep border fabric, and suddenly we *needed* to make Julia a new dress.

2012 03 16_0352.JPG

I got the fabric home and washed it, as usual.  While folding it, Elena came over and insisted that she needed a dress made out of that sheep fabric!  Hmmm.  I called my Mom and we hemmed and hawed over that, thinking about how Elena is growing up and perhaps this fabric would just be too babyish for her.  No final decision was made as it was still winter and I wasn’t making the dress anytime soon.

But you know what, when I brought out the fabric a couple weeks ago to make a dress for one of my girls, I finally came to the realization that my 6-year-old might seem really big, but she is still a little girl, and if she wants a dress made out of little sheep, then by gosh she’s going to get a dress with little sheep!  My Mom whole-heartedly agreed.  And the dress was made.

2012 03 16_0349.JPG

Elena just seems so big and grown up already, especially compared to her little sister.  But seeing the dress on her, it is perfect and it is perfectly her.  No matter how tall she is, she still needs lots of hugs, kisses, encouragement, and maybe even some cartoon sheep.

This pattern is one I’ve used many, many times before: New Look 6613 (some of my previous version can be seen here and here.)  I altered the pattern slightly — mainly because I couldn’t cut the bottom of the skirt in a curve as drawn as it would cut the sheep border off, and also because I wanted the skirt to twirl some more.

2012 03 16_0368.JPG

There’s 2-yards’ length in that skirt!

So I used the entire length that we bought, gathered it and attached it to the bodice.  I made the dress a size or two too big because I’ve gotten caught on Elena growing out of things way too fast.  I now sort of wish I made it a bit truer to size, but it is still cute and will last for a while hopefully!

2012 03 16_0344.JPG

I put the straps close to the middle in the back of the dress hoping it would prevent them from falling down so much, but they still fall down some.  I think maybe if I’d stuck with her size this would have worked better.

And on a side note, isn’t Grammy and Papa’s backyard great?!?  The girls spend forever out there exploring.  In this next picture, it is hard to tell but Elena is playing with a spider web, trying to see which strings are sticky and seeing if the spider will move:

2012 03 16_0378.JPG

Go Team!

Some good friends of ours recently found out that they are expecting a little boy in a few months.  Of course this means I’m going to make a quilt, but in the meantime I thought it’d be fun to mail them a couple onesies to help celebrate.

2012 02 29_0002.JPG

I admittedly got the idea to make these sports-themed onesies from someone else.  You can buy some great sports-ball onesies for yourself, instead of crafting them, at Bambino Balls.   I’ve heard from a friend that they are great quality.  However, if you have some onesies and some felt, they are also pretty easy to make.  I picked up my plain onesies from Hobby Lobby (yes, they carry plain brown!) and used some felt and Steam-a-Seam I had around.  I then just ironed on the felt and stitched around it.  Et Voila!  2 new onesies!

I am a huge fan of the football onesie and would have loved to dress my girls in one and carry them around all over in the football carry.  Tons of fun for sleep-deprived parents!  ha!  My baseball onesie is just okay in my mind.  My husband actually couldn’t figure out what it was supposed to be even though he got the football one immediately.  Looking at the ones from Bambino Balls perhaps I should have chevronned the short lines…

2012 03 01_0001.JPG

And I include this seemingly nearly-identical picture to remind everyone to PREWASH!  The onesies I picked up are incredibly soft and thick.  And apparently shrink the heck all up in the wash.  I had pre-washed the brown onesie before I started to make sure the brown wouldn’t bleed.  I totally forgot about the white onesie because, hello, there wouldn’t be any bleeding issues, totally forgetting about shrinkage.

The picture at the top of this post shows both onesies, both sized 6 months.  The brown one has been washed but the white one has not.  The white onesie looks HUGE!  Yet they both started at the same size!

The picture at the bottom of this post shows both onesies again, now both washed.  (I washed because I now was worried that the red would bleed and wanted to be sure the gift wasn’t going to be ruined with it’s first use.)  But look, now the white one seems smaller than the brown!  Again, they started at the same size!  And of course, by not pre-washing my felt got a bit funky.  Ahh well.  Still good enough to send for sure, but a good reminder to pre-wash, and perhaps also a pointer to not buy the smallest onesies at Hobby Lobby because they might shrink to nothing!

These will hopefully go in the mail tomorrow, and then I’ll continue quilt discussions with my husband for this new baby.  He has definite opinions.

View from the Sewing Room

I’ve been *very* busy in the sewing room lately as I try to finish up using all of my vintage sheets.  I just want them OUT of my sewing room — I’m tired of their half-polyester ways!  I’m going to offer my scraps when I’m done to some local friends, and if that doesn’t work they’ll go on the guild’s free table- that’s how much I want them gone!

And so, lined up in my closet I have 4 vintage sheet quilts all ready for pin-basting and then quilting, as well as 2 alien-fabric baby quilt tops I also put together this past month:

2012 02 24_0112.JPG

2 of these tops were just pieced this past weekend – one on Saturday and one on Sunday.  I felt so accomplished!
And, on my sewing room floor I have a gazillion (yup, I counted) scraps of batting that I’ve been piecing together to form the properly-sized battings for each of those 6 tops.

2012 02 24_0113.JPG

Many many many pieces of batting, thankfully labeled with their sizes to help figure out the piecing.

Yikes!  I only have one more batting that I have to piece and then these can go back to hiding in boxes.  It’s been a bit of a chore admittedly trying to puzzle together similar pieces of batting – there are so many different kinds and sizes here!

I can thank my Mom for all those lovely scraps of batting.  She often has pieces at the end of the bolt that she can’t use because they’re just too small, and she of course does not piece customers’ battings.  However, piecing a batting is perfectly acceptable and will last as long as you piece/fuse it well and then quilt well.  Nobody will know once these quilts are done that the middles were pieced.

And then I get to baste all of these tops. Can’t say I’m looking forward to that, but I hope to do some tonight — the kitchen floor is mopped and ready!  I definitely don’t have enough pins for all of them, though, so I’ll have to prioritize. I have one baby waiting for an alien quilt, so that’ll definitely be basted first.

Warm and Cozy

More than anything, I love snuggling under flannel quilts.  Flannel just adds so much extra warm and cozy.  This flannel quilt in particular has been well used this fall and winter.  Yup, well-used despite the 80-degree temperatures this February day.

2012 02 03_0101.JPG

It’s so tiny!  Well, not really, but on this big red barn it sure looks tiny!  The quilt measures 48″ x 60″.

Some of you may remember this quilt, and especially remember helping me choose the layout for the blocks!  I made this quilt top, yikes!, 2 years ago this week!  You can find all my previous posts while making the top here, here, here and here.

2012 02 03_0096.JPG

I made it as part of a sewing challenge to make a project during the span of the Winter Olympics.  I in particular wanted to make my first string quilt with scraps as practice for making a string quilt with my fave Kaffe Fassett fabrics.  The method really is simple and I am unfortunately still just planning on making the one with my beloved Fassett fabrics.  Methinks I need to make a list! Or just look at the twenty lists that I already have around here…

The top was finished during the challenge in 2010, but the quilt wasn’t bound and finished until 2011, and now I’m finally blogging it in 2012!  My mom did the fabulous quilting in a timely manner and returned the quilt to me promptly, as always.
2012 02 03_0098.JPG

Fabulous quilting, as promised!

However, I decided it needed a flannel binding to complement its flannel front and back.  And of course I took my sweet time getting to the store to buy up some red flannel to make the binding!  And so this quilt sat and waited for my attention, as all my quilts seem to do.

2012 02 03_0104.JPG

I am definitely very happy to be snuggling under this quilt.

2012 02 03_0107.JPG

And I’m also definitely happy to see this bright green lush grass above!  I feared we’d never see green again around here after last summer’s drought!  Of course, let’s not talk about how most of the green we see is all weeds now since most grass died out everywhere, and that we’re really still in a drought despite the rains we’ve luckily received of late….

A Recommendation

If you aren’t already, I totally recommend following any blogs from your favorite fabric company.  I have a few on my blog reader and I really like them because it is fun to see what fabric designs are coming out or being re-released, AND because the fabric companies often also put out patterns.  I think most quilters on blog land know all about the Moda Bakeshop, but other fabric company blogs I follow are from Michael Miller fabrics and Free Spirit.

What is also admittedly quite fun is that some of them host fabric giveaways, and we all love getting free fabric, right?

Back in August I entered such a giveaway on the Michael Miller site and my goodness, I won the Retro Color Story giveaway!  Due to some difficulties with getting the fabrics from the warehouse and probably just some general busy-ness and/or forgetfulness, I didn’t get the fabrics right away.  But, when I did get the fabrics this January, Kathy Miller herself wrote me and made sure my package had some extra goodies to make up for the delays.  So in my box, not only did I receive the 11 yards of fabric in the Retro color story,
2012 01 17_0011.JPG

I also received 10 yards from the Once Upon a Time fabric line, several fat quarters from the Fairy Frost collection, several fat quarters of their new Cotton Couture solids, and a charm pack of all their solids!
2012 01 17_0013.JPG

!!!
2012 01 17_0014.JPG

SO very exciting to open up that box! By the way, the Michael Miller regular fabrics have a great heavy weight that I’ve always loved about their fabrics — makes them super easy to quilt with.  What I found surprising was how silky soft their cotton couture line was — a totally different weight!  I’m sure they’ll be great for quilts as well, but I’m looking at getting one of the colors  for a  planned summer dress for one of my girls – the weight should be perfect.

Now I’m sure you’re wondering what I’m going to do with all of this fabric, and to be honest I’m not sure.  I have finished washing and folding it all and for now I’m admiring it.  I think the pink fabrics will be turned into some dresses or skirts for my girls — that’s at least what Julia is requesting.  And I’m sure the original retro fabrics will be turned into a cute baby quilt or 2 or 3 — I know at least one baby boy about to arrive that needs a quilt!

So, go out and have some fun with some Internet contests as well, although I definitely won’t promise you’ll hit the same jackpot I did!

Craft Your Own Christmas Cards

(Since I’ve skipped blogging for so long, my posts might be skipping all over the place too!)

My personal philosophy with Christmas cards is that I like to send something with a religious message because, well, I am celebrating a religious holiday and wishing people all the good and promise that that religious holiday entails.  So, to this point, I’ve always bought Christmas cards – generally Hallmark – and enclose within a picture of my girls.  Two birds with one stone!  It would certainly be easier to make a simple picture card, and I’ve definitely considered doing just that, but have still done my store-bought cards to this point.
Christmas Card 2011.jpg

The picture of my girls enclosed in the cards this year — obviously I cut it in 2!

This year, though, it had reached mid-December and I had yet to buy the Christmas cards, and the store cards I really loved tended to be on the pricier side.  And while I’m not a paper-crafter at all, paper-crafting came to the rescue!

My girls were already off school for Christmas break, so I set them down at the kitchen table with a bunch of paper and crayons and instructed them to draw something Christmasy!  The results were…not blog-worthy.

I regrouped and instead pulled out a bunch of construction paper, scissors, markers and glue and this time instructed them to make Nativity scenes.  I had to exert some control!  And my goodness, the results could not have been better.

Elena went after this project with no instruction from me at all.  Well, I did mention to her that Mary often wore a head-covering.  But that was it!  I LOVE what she did:

2011 12 19_0074.JPG

Elena is especially proud of her manger made with the hole in the middle.  I think it must be a new trick she just learned.

Julia also did fabulous work although she needed a little more help.  I gave her pieces of construction paper in the general size that she needed and she’d finish cutting them into shape.  She also looked to her sister’s artwork for guidance.  I also LOVE hers:

2011 12 19_0069.JPG

Now, there’s no way were were sending Christmas cards out the size of construction paper, nor were we going to craft up 70 of these!  So, we then took their Nativity scenes to the copy store, shrunk them, and printed 2-to-a-page.  I had intended on printing them at the proper location on cardstock so I’d just have to fold them, sign them and mail them, but the copy-worker and I were having some communication issues.  At any rate, we then headed to a friend’s house and used her paper cutters and tape rollers and fashioned up our cards.  They were in the mail a few days later in time for Christmas!

2012 02 01_0001.JPG

The finished cards — the color copies were awesome!

I must admit here that at least one of our recipients didn’t quite understand Julia’s picture and what I thought was a nice religious Christmas card.  He brought it with him to visit us and was asking Julia all about the kitty she made and pointing to the kitty’s eyes and mouth?  I don’t quite see it, but art is in the eye of the beholder?

Those on our Christmas card list can definitely expect to see more hand-crafted cards like this in the future.  I mean, doesn’t everybody want my childrens’ artwork for eternity?  I know *I’m* holding onto it forever!

Design-Your-Own-Fabric Dresses

All the rage everywhere in sewing land is designing your own fabric.  And for good reason — it is fun to have complete control over the design process and get *exactly* what you are looking for.  Most of the time people are talking about designing their fabric with the likes of Spoonflower, but I decided to go old school with the girls this summer.  I busted out some watered-down fabric paints (to make the painting easier) and about 2 yards of solid white fabric and let the girls have at it.  (You might remember that I briefly mentioned this when we did it in July.)

They started out with a bunch of sprinkling:
2011 07 15_0020.JPG

And then moved on to painting some spots:
2011 07 15_0024.JPG

And finished with a great piece of fabric:
2011 07 15_0026.JPG

I’ll admit I had trouble giving up control on this fabric, and wished at times that I didn’t put the green or purple fabric paints out, or that I made them only paint instead of sprinkling, or that I made them only sprinkle instead of painting, or or or.  Ultimately I was happy enough with the finished product.

In August I tried to make them dresses out of the fabric, but my machine did *not* like working with elastic thread and died on me.  After being repaired, I finally brought the dresses back out and finished them in October.

2011 10 15_0017.JPG

I used Izzy and Ivy’s Ava Tie Top pattern.

For Julia’s, I thought it looked good without a bow and therefore didn’t add the tie loops or make a bow.  I also cut off some of the length and didn’t do the pintucks on the bottom of the dress.  The dress fit well and I really liked it.  For Julia.

2011 10 15_0033.JPG

2011 10 15_0026.JPG

Julia was really into posing that night…

As for Elena’s, it didn’t turn out as well.  It ended up being too narrow/thin for her frame and I decided to go forward with the tie loops and the bow to hopefully hide the fact that the dress is too narrow.  Instead, the bow pretty much takes over the dress.  (FYI: The bow was this size on the pattern I got.  The newest cover of this pattern appears to have a smaller tie/bow.)  I cut the length and didn’t do the bottom pintucks on this one either. Since this outing, I don’t think Elena has taken this dress out even once to wear.

2011 10 15_0040.JPG
2011 10 15_0043.JPG

At least she had fun painting! And eating her candy necklace!
2011 10 15_0048.JPG

And I’ll definitely consider having them paint fabric again.  It really was a lot of fun!

Boo!

Did I scare you?!?  (sorry, channeling my younger daughter who “hides” all over, jumping out with very loud but not very scary or surprising “Boo!”s.)

At the beginning of this year I got all sad reading everybody’s reviews of 2011 with lists of things they’ve done.  The thing is, I did *lots* of crafting and sewing in 2011, but I did a poor job of documenting it.  And I miss blogging about everything.

So, for myself, my goal for 2012 is to blog more about my crafts.  And it only took until late January to get that goal written out!  ha!

Anyway, I love show and tell.  And although this is a brief hello, there is definitely more to come.

As evidence that I’ve been busy, here’s a picture of 4 different bindings ready to go on quilts!
2012 01 07_0030.JPG
They look rather patriotic together, don’t they? The red ones are for semi-patriotic quilts — I at least plan on donating them to Quilts of Valor.  The blue one is for a space quilt, and the one binding is for a very feminine floral quilt my mom made.  I called dibs on it, and she gave it to me all done except for the trimming up and the binding.  Pretty good deal if you ask me!